Complaining about shoulder soreness is a problem that many people experience. The shoulder is composed of multiple joints in combination with ligaments and muscles which give the arm a vast span of movement. The shoulder is made up of numerous components, making it vulnerable to various issues. Pain in the shoulder area commonly originates from the rotator cuff.
Anatomy
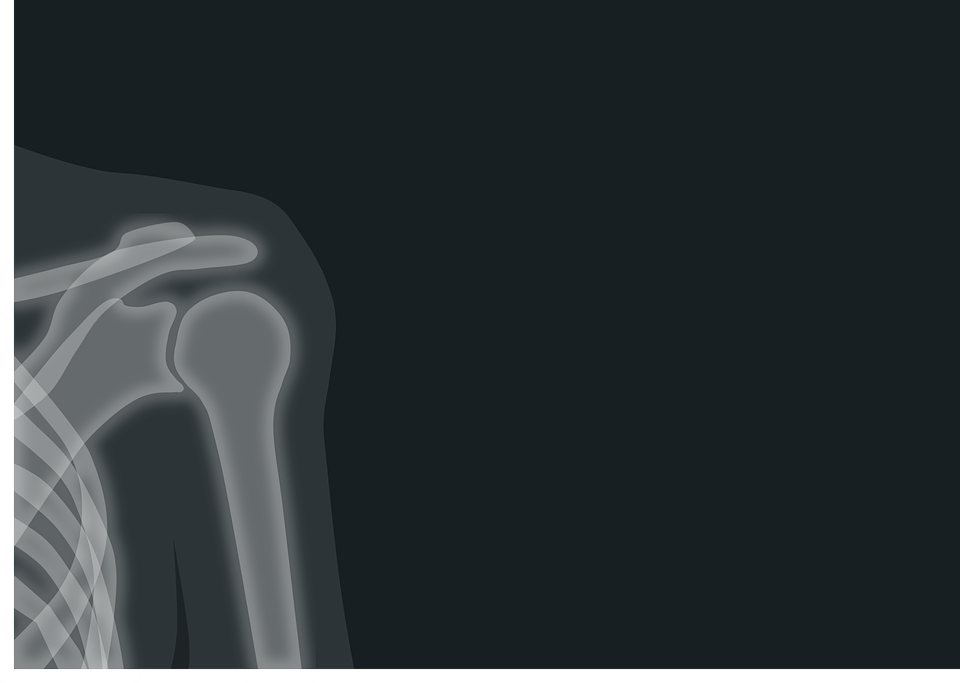
The composition of your shoulder consists of three different bones; the humerus, scapula, and clavicle.
The rotator cuff is responsible for maintaining your arm in the shoulder socket. The head of the upper arm bone is encased and secured to the shoulder blade by muscles and tendons.
A bursa, which is a kind of lubricating sac, is situated between the rotator cuff and the acromion, which is the bone on top of the shoulder. The bursa facilitates the smooth movement of the rotator cuff tendons when you move your arm.
The Relationship Between Posture and Shoulder Impingement
Having a good stance is the foundation for efficient movement and when your posture is incorrect it impedes your athletic capability. It is not necessarily true for all people, but I have found that a majority of movement disorders come from how our bodies are maintained the other 23 hours a day, not the one hour that we are exercising.
Shoulder impingement is a very widespread problem in posture, and tenderness in the front area of the shoulder is frequently an indication of some form of shoulder impingement. This opinion is reasonable, yet I don’t believe that impingement is a valid medical diagnosis. This is similar to diagnosing someone with a muscle or joint issue based on their symptoms of coughing. There are treatments for a cough. At your local pharmacy, there is a whole section dedicated to medications for coughing, and the same applies to treating shoulder impingement, usually recommended to be nothing more than taking a painkiller and taking a break. Nonetheless, both a cough and impingement are indicative of some bigger issue at hand. It can be beneficial to address the symptoms, however, a definitive resolution of the issue cannot be achieved until it is tackled at its root.
How Shoulder Impingement Happens
Impingement in the shoulder can take place when the bones encircling the area abut against the bursa, a lubricating pouch situated atop the rotator cuff, and the tendons beneath it. The numerous causes of impingement include problems with the rotator cuff, a lack of shoulder strength, shoulder instability, biceps tendonitis or tendinosis, and more.
Oftentimes shoulder impingements receive treatment similar to that of weakened rotator cuff muscles, particularly in the external rotators. The argument is as follows: If you have your arms rotated towards the inside, it can only be because the inside muscle groups are tightened and the outside ones are stretched and lack strength. Thus, if you fortify the muscles that rotate outwardly, the issue will solve itself. Right? Well, no, not really. Impingement will certainly generate rotator cuff weak points, and often – if neglected – it can cause rips in the rotator cuff and labrum. It is still not proven that the issue is necessarily the rotator cuff.
What would happen if you requested assistance from a friend of yours, but before showing them what they had to do, you put a blindfold over their eyes? No matter how accomplished or inadequate they may be, it’s not probable that they would be able to grasp and carry out the task while blindfolded, though it’s conceivable that they could come up with some kind of fragmentary, blinkered solution. This is basically what is happening with the muscles and tendons in your shoulder area. If your shoulder blade is not moving properly or is in the wrong position, the muscles surrounding the shoulder will not be able to work as they should. It’s flying blind. Bringing your scapula back to proper functioning can help to take off the blindfold. Strengthening the cuff muscles may still be necessary, but it is important to start by correcting the scapulae.
Impaired Movements From Impingement
The two most typical signs of limited body movement that I observe are shoulders rolled forward and elbows rotated inward. This is suggesting that your shoulder blades have moved away from your spinal column, and your shoulders are slouched and angled forward. Can you figure out what job this is probably coming from? The issue of discomfort at the hip is often a result of excessive tension in the front muscles coupled with the weakening of the backing musculature due to its continual lengthening. It appears that the best course of action would be to concentrate on the areas that need work and bolster those that are already strong. Let’s start with mobility.
Step #1: Mobilize the Pecs
The front side can be stiff in two parts- the pec major and minor. Many people in the fitness industry have discouraged stretching in recent years since it causes the muscle being stretched to become inactive, thereby disrupting maximal force production. But what if you actually want the muscle to relax, like if it has been continually tensed up? In this case, I think stretching is pretty fantastic.
Two of my favorites for pec stretching are using a door frame and foam rolling. Stand in front of an entrance, with your limbs at a level slightly underneath the shoulders and facing forward. Go up to the entrance and put your hands, wrists, or whatever part of your lower arm on the frame and push them away, creating tension in your chest muscles. This exercise can be done with the elbows bent at 90 degrees or by focusing on one shoulder at a time in order to make it more intense. Hold for three sets of thirty to sixty seconds.
This foam roll pec stretch is a more passive approach and likely more effective at providing total relaxation. Lie on the foam roller with your head and hips resting on it, oriented in the same direction as the roller. Extend your arms straight ahead of you as if you were giving a huge clap like the Hulk would. From here, let your arms fall to your sides. Do not slouch and hunch over, stay upright and aligned. Your pecs should feel a stretch as your arms move downwards. Instead of placing the foam roller on the ground, put it up on a table or bench so that your hands can go lower than they could on the ground, which will make the stretch even more intense.
Another solid choice for activating the pectoral muscles is using a lacrosse ball. Stand facing a wall. Put the ball in the middle of your chest and apply pressure by pushing your body into the wall. You need to press around your pectoral area until you locate areas of tension. You have the option of using your body weight to attempt to reduce the tension in the muscles or find an area of tension and gently move your arm while continuing to press into the area with the ball to floss the tissues a bit. If you can locate a spot to rest against that allows your arm to extend unobstructed past the wall, that would be ideal. Do this for two or three minutes per pec.
Step #2: Mobilize the Lats
The next mobilization target area is your lats. If you find it hard to flex your arm all the way, wouldn’t it be sensible to mobilize the muscle responsible for extending your shoulder? The preferred instrument is going to be the foam roller.
To stretch your lat, get into the same position on the roller you used for the pec stretch. This time, move your arms up and over your head. Be sure to clench your abdominal muscles and keep your spine aligned with the foam roller. When we lack full shoulder flexion, we will tend to assess by extending the lower back in order to substitute, yet that is an undesirable option. Tightening your abdominal muscles helps to keep your lower back in place and makes sure that the stretch affects your lats. A lot of individuals find that the strain of their arms isn’t enough to get a stretch, considering the lat is a substantial muscle. If this occurs, you can retain your grip on a weight disc, a barbell, or a flexible band, or have a pal assist with a mild force on your forearms until you detect the elongation. Do this again three times for between thirty seconds and one minute.
You can also work out your lats using a foam roller or lacrosse ball. Look for locations where the muscles are tense, and use steady force to relax them or pinpoint the tissue and move your arm to release the tension. In this instance, it is suggested that you use flexion to floss, which means bending into flexion.
Step #3: Strengthen the Weak Stuff
I’m hoping you have been able to regain some mobility in the muscular tissues around your shoulder. Now, you must make the muscles on the opposite side of your body stronger in order to keep the new posture. The objective of this workout is to focus on the rhomboids and lower trap muscles, which are used to draw the shoulder blades together and toward the bottom.
Lying down for Ts and Ys can be a good method for creating basic strength. Begin with lying Ts and Ys on a surface such as a tabletop or a bench and advance to doing them while resting on a Physio Ball. Rowing from an elevated position and pulling the bar down to the abdomen while deliberately focusing on keeping the arms tucked in towards the body is an exercise with an emphasis on the lower trapezius muscle. It could be beneficial to do these activities with one side at a time, as frequently one side of the shoulder blade can be more afflicted than the other (strangely, it is usually the stronger side). Do each exercise for three to four sets at eight to ten reps. Lean towards being too gentle rather than too forceful. It’s all about proper form here.
Doctor Examination
Medical History and Physical Examination
After talking to you about your indicators and past medical history, your doctor will perform an examination of your shoulder. They will assess if any areas are sore to the touch or if there is any misshapenness. Your doctor will get you to move your arm in various ways in order to determine the extent of mobility of your shoulder. They will also test your arm strength.
Your physician will investigate any other issues with your shoulder joint. The doctor might also investigate your neck area to verify that the discomfort is not resulting from a compressed nerve and to deny other ailments, such as arthritis.
Imaging Tests
Other tests which may help your doctor confirm your diagnosis include:
X-rays. X-rays cannot detect the presence of rotator cuff pain in the soft tissues of the shoulder but may indicate that a small bone spur is present. An X-ray exam known as an outlet view can sometimes demonstrate that there is a tiny bony outgrowth on the front point of the acromion.
Magnetic resonance imaging (MRI) and ultrasound. Magnetic Resonance Imaging (MRI) can generate a clearer picture of soft tissue components such as rotator cuff tendon than X-rays can. It is possible to demonstrate either fluid or inflammation in the bursa and rotator cuff. In certain situations, a partial rupture of the rotator cuff can be observed.
Treatment
Nonsurgical Treatment
In most cases, initial treatment is nonsurgical. It may take a few weeks or months to treat a condition without surgery, but most people find that their situation gradually gets better and that they can go back to functioning normally.
Rest. Your physician might advise taking it easy and changing how you move, such as not doing any activities that hold your arms up high.
Non-steroidal anti-inflammatory drugs (NSAIDs). Medications like ibuprofen, aspirin, and naproxen can alleviate pain and inflammation.
Physical therapy. At first, a physical therapist will work to bring back the typical movement in your shoulder. Doing stretching exercises to boost the ability for motion is incredibly beneficial. If you find it hard to extend your arm to the rear of your body, you may be suffering from stiffening or constricting of the rear component of the shoulder cover. (The cover of the shoulder is made up of an inner lining and the rear of the shoulder, in particular, is being spoken of here.) Extending the back part of the capsule can be notably helpful in reducing shoulder pain.
Once your suffering is lessening, your therapist can get you started on an exercise regimen for the rotator cuff muscles.
Steroid injection. If your pain is not relieved through rest, drugs, and physical therapy, a shot of local anesthetic and a cortisone medication may be beneficial. Cortisone is a very effective anti-inflammatory medicine. Placing the medication into the bursa located under the acromion may ease discomfort.
Surgical Treatment
If the non-surgical remedies do not ease the pain, your physician could suggest performing a surgical procedure.
The objective of the surgical procedure is to make more room for the rotator cuff muscles. Your doctor will take out the irritating part of the bursa in order to accomplish this. They may also remove part of the acromion. This is also known as subacromial decompression. These procedures are usually done with an arthroscopic technique.
Arthroscopic technique. Thin surgical instruments are inserted into your shoulder through two or three tiny incisions during arthroscopy. Your doctor inspects your shoulder via a fiberoptic scope connected to a television camera and uses a video monitor to maneuver the miniature instruments, taking away bone and other tissues. In the majority of instances, the front side of the acromion is taken away in conjunction with some of the bursal material.
Your surgeon may also address any other issues concerning the shoulder during the operation. These can include:
- Arthritis between the clavicle (collarbone) and the acromion (acromioclavicular arthritis)
- Inflammation of the biceps tendon (biceps tendinitis)
- A partial rotator cuff tear
Rehabilitation. After the operation, it is likely that you will be asked to wear a sling on your arm for a while. This allows for early healing. Once you are feeling comfortable, your physician will take off your sling so that you may start doing exercises and using your arm.
Your physician will devise a recovery program specifically tailored to you and the results of your surgery. This will involve activities to get back the flexibility around the shoulder and the power of your arm. It usually takes between two and four months for the pain to go away entirely, but it could take up to twelve months.

